
How to setup MedusaJS Backend on a Custom Domain
Are you unclear about DNS, HTTPS, or domain names? We will guide you through every step, so don't worry!
TL;DR
- Option 1: Stick with the default domain for zero work
- Option 2: Use your domain and let Nomodo handle security
- Option 3: Use your domain with your custom TLS certificates
The Significance of Custom Domains
Your e-commerce site is powered by your MedusaJS backend. The temporary URL that it is usually housed on is mymedusafrom.nomodo.app. However, you should select your own domain (for instance admin.mymedusafrom.com) if you want a professional look. Even if you have never worked with DNS settings before, let's look at three easy ways to accomplish this!
Option 1: Stick with the default domain for zero work
Perfect for: Users looking for a simple and safe setup.
There is nothing you need to do if you are okay with your Medusa backend being hosted on a domain that Nomodo provides (such as mymedusafrom.nomodo.app). Nomodo manages automatically. Maintenance: none. Security: TLS and HTTPS are prepared and set for you.
What to do: Nothing at all! Take pleasure in your ready-to-use backend.
Option 2: Use your domain and let Nomodo handle security
Best for: Users who want their own domain (e.g., admin.myshop.com) without managing certificates.
This option lets you use your own domain while Nomodo handles HTTPS security. Here’s how:
- Set Up DNS with Cloudflare:
- If your domain uses Cloudflare for DNS management, log in to your Cloudflare dashboard.
- Add a CNAME record (a redirect rule) pointing your domain (e.g.,
admin.myshop.com) to your Nomodo backend URL (e.g.,mymedusafrom.nomodo.app). - Proxy status set to “DNS only”.
- Tell Nomodo Your Domain:
- In the Medusa dashboard, select Cloudflare as your provider.
- Enter your custom domain (e.g.,
admin.myshop.com).
- Let Nomodo Do the Rest:
- Nomodo will automatically generate and renew HTTPS certificates for your domain.

No Cloudflare? If your domain uses another DNS provider (like GoDaddy), you’ll still need to create a CNAME record pointing to Nomodo.
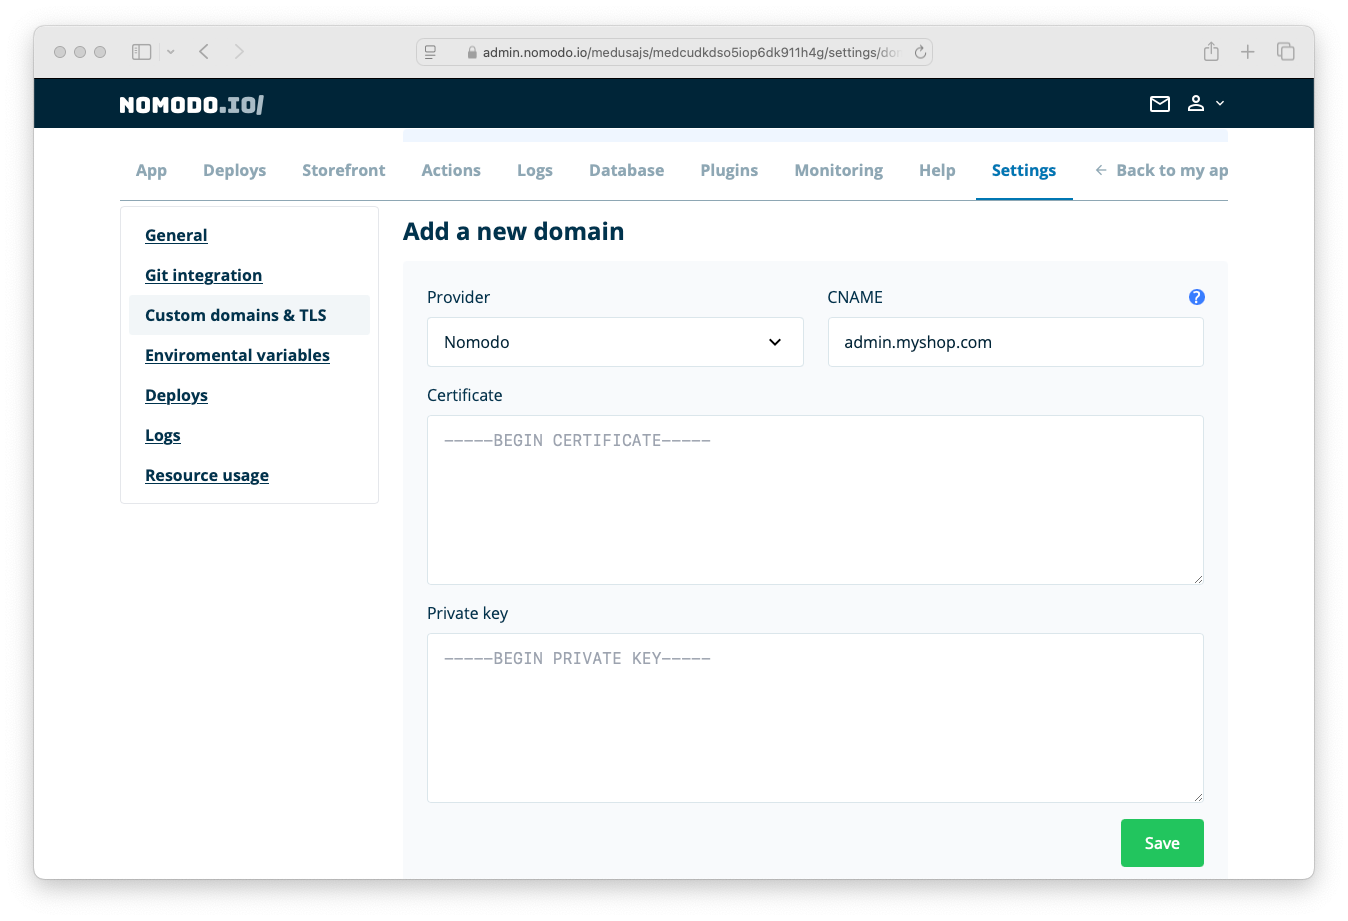
Option 3: Use your domain with your custom TLS certificates
Best for: Users who already own TLS certificates and want more control.
If you want to have your own domain (e.g., mymedusafrom.myshop.com) and want to use your own TLS certificates (digital "passports" for HTTPS security), here’s how:
- Select “Nomodo” as your provider in the Medusa dashboard.
- Paste your TLS certificate and private key into the fields provided.
- Save changes. Your backend will now use your certificates while staying on Nomodo’s domain.
Wrapping Up
Customising your Medusa backend’s domain is easier than you think! Whether you stay with Nomodo’s default domain, use your own certificates, or let Nomodo secure your custom domain, you’ll get a professional, secure setup in minutes. Follow the steps above, and you’re done!
Need help? To stay updated on what’s new at Nomodo, follow us on Twitter or join our Nomodo.io Discord channel. Also, don’t miss exploring MedusaJS.
Cheers,
The Nomodo Team