
How to Connect to a PostgreSQL Database Using Adminer in MedusaJS
Learn how to connect your MedusaJS project to a PostgreSQL database using the Adminer interface, a simple and efficient tool for managing your database.
Pre-requisites
Before starting, make sure:
- Your GitHub account is connected to Nomodo.io.
- You have an instance of MedusaJS set up on the Nomodo.io admin panel.
Step 1: Access Your MedusaJS Project on Nomodo.io
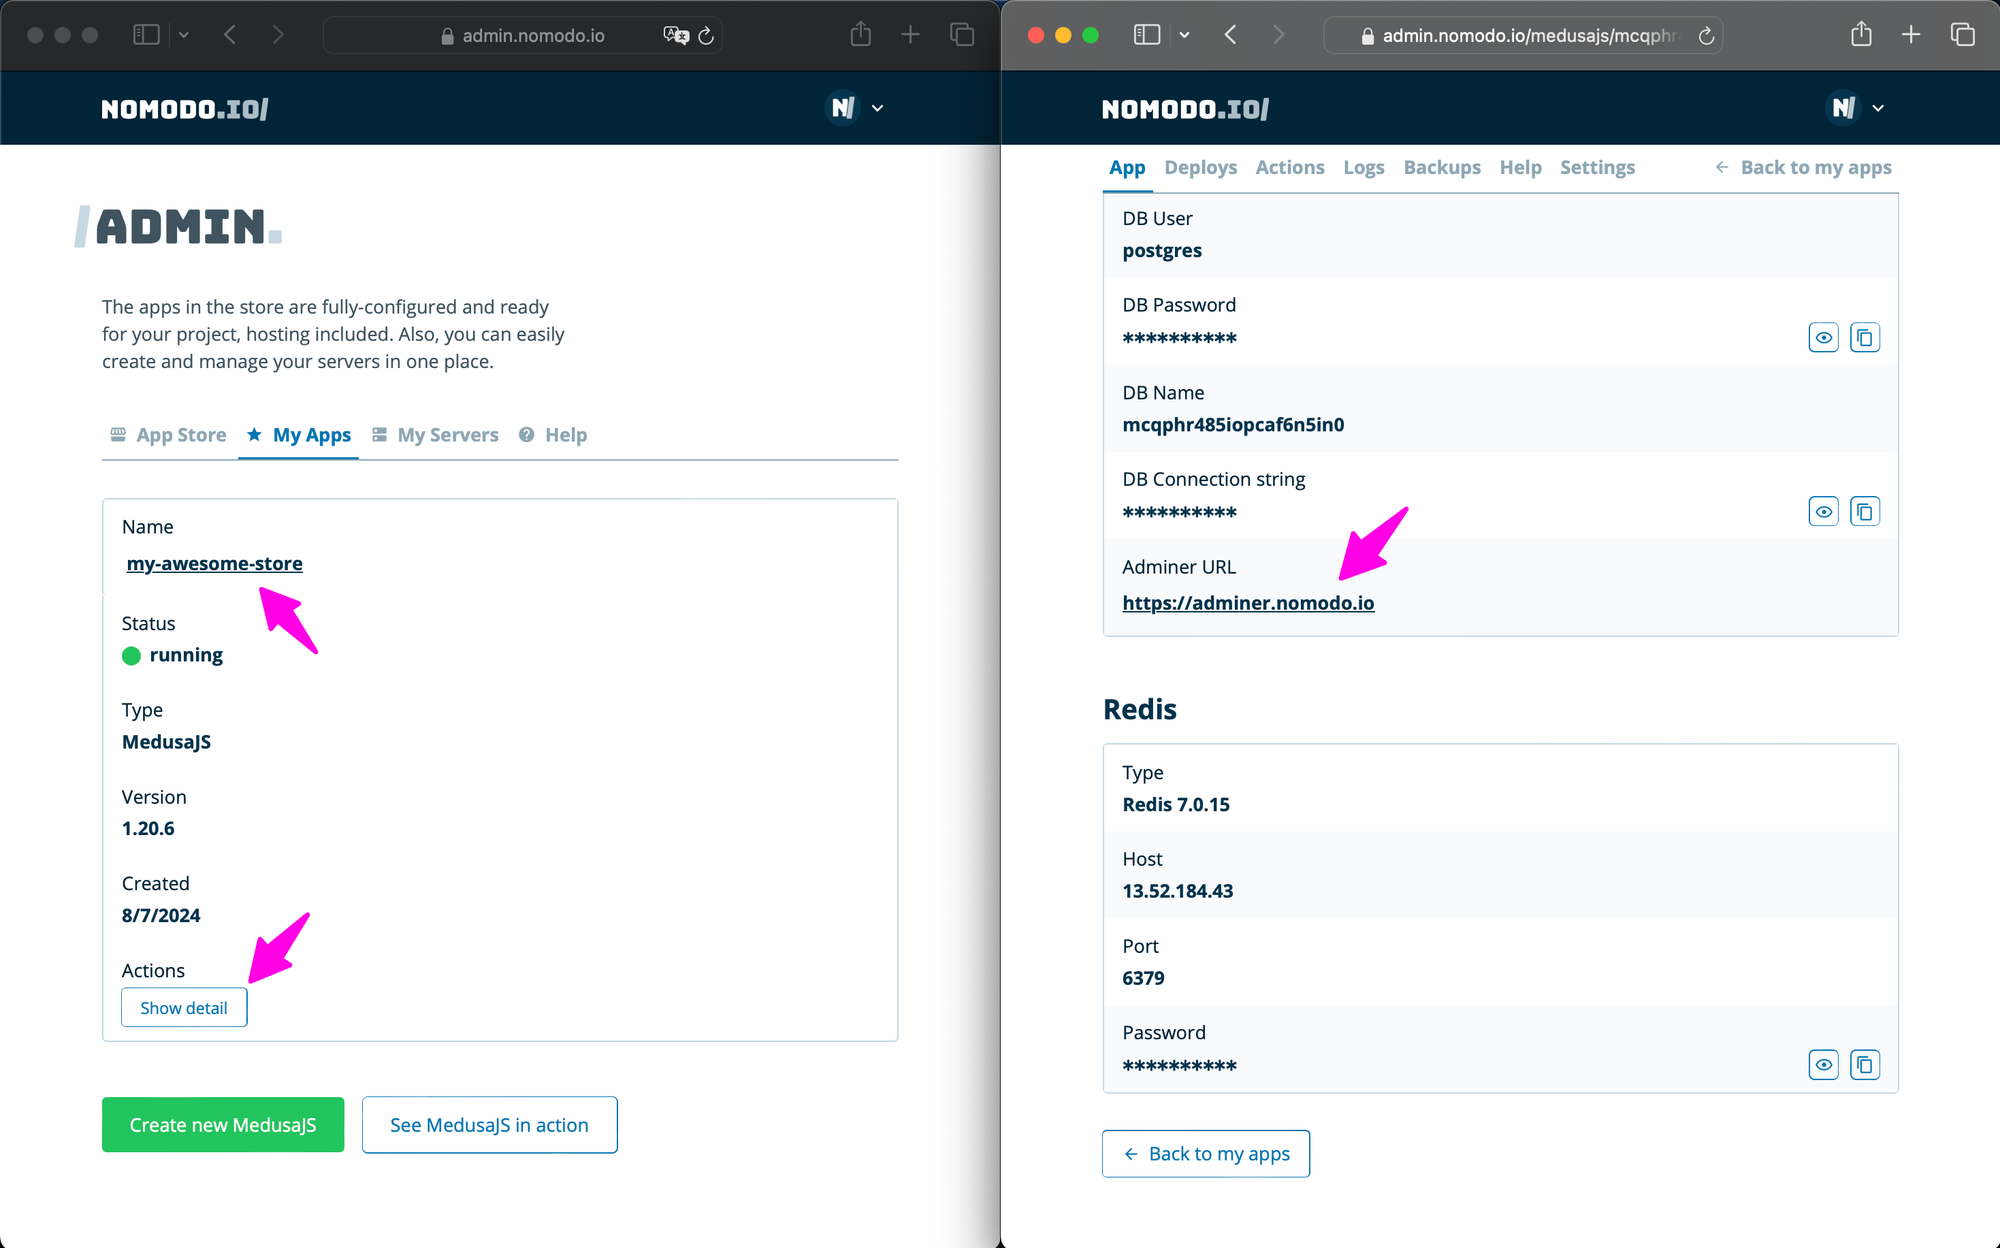
Ensure your MedusaJS project is running on Nomodo.io. Go to the Nomodo admin panel, locate your MedusaJS instance, and click on “Show Details”. This will display information about your app, including a link to the MedusaJS admin panel and a database section.
Step 2: Connect to the PostgreSQL Database
In the database section, click on “Admin” to access the Adminer interface. Adminer allows you to manage your PostgreSQL database. You’ll need the following credentials to log in:
- System:
PostgreSQL - Server: Your PostgreSQL host address
- Username: Your PostgreSQL username
- Password: Your PostgreSQL password
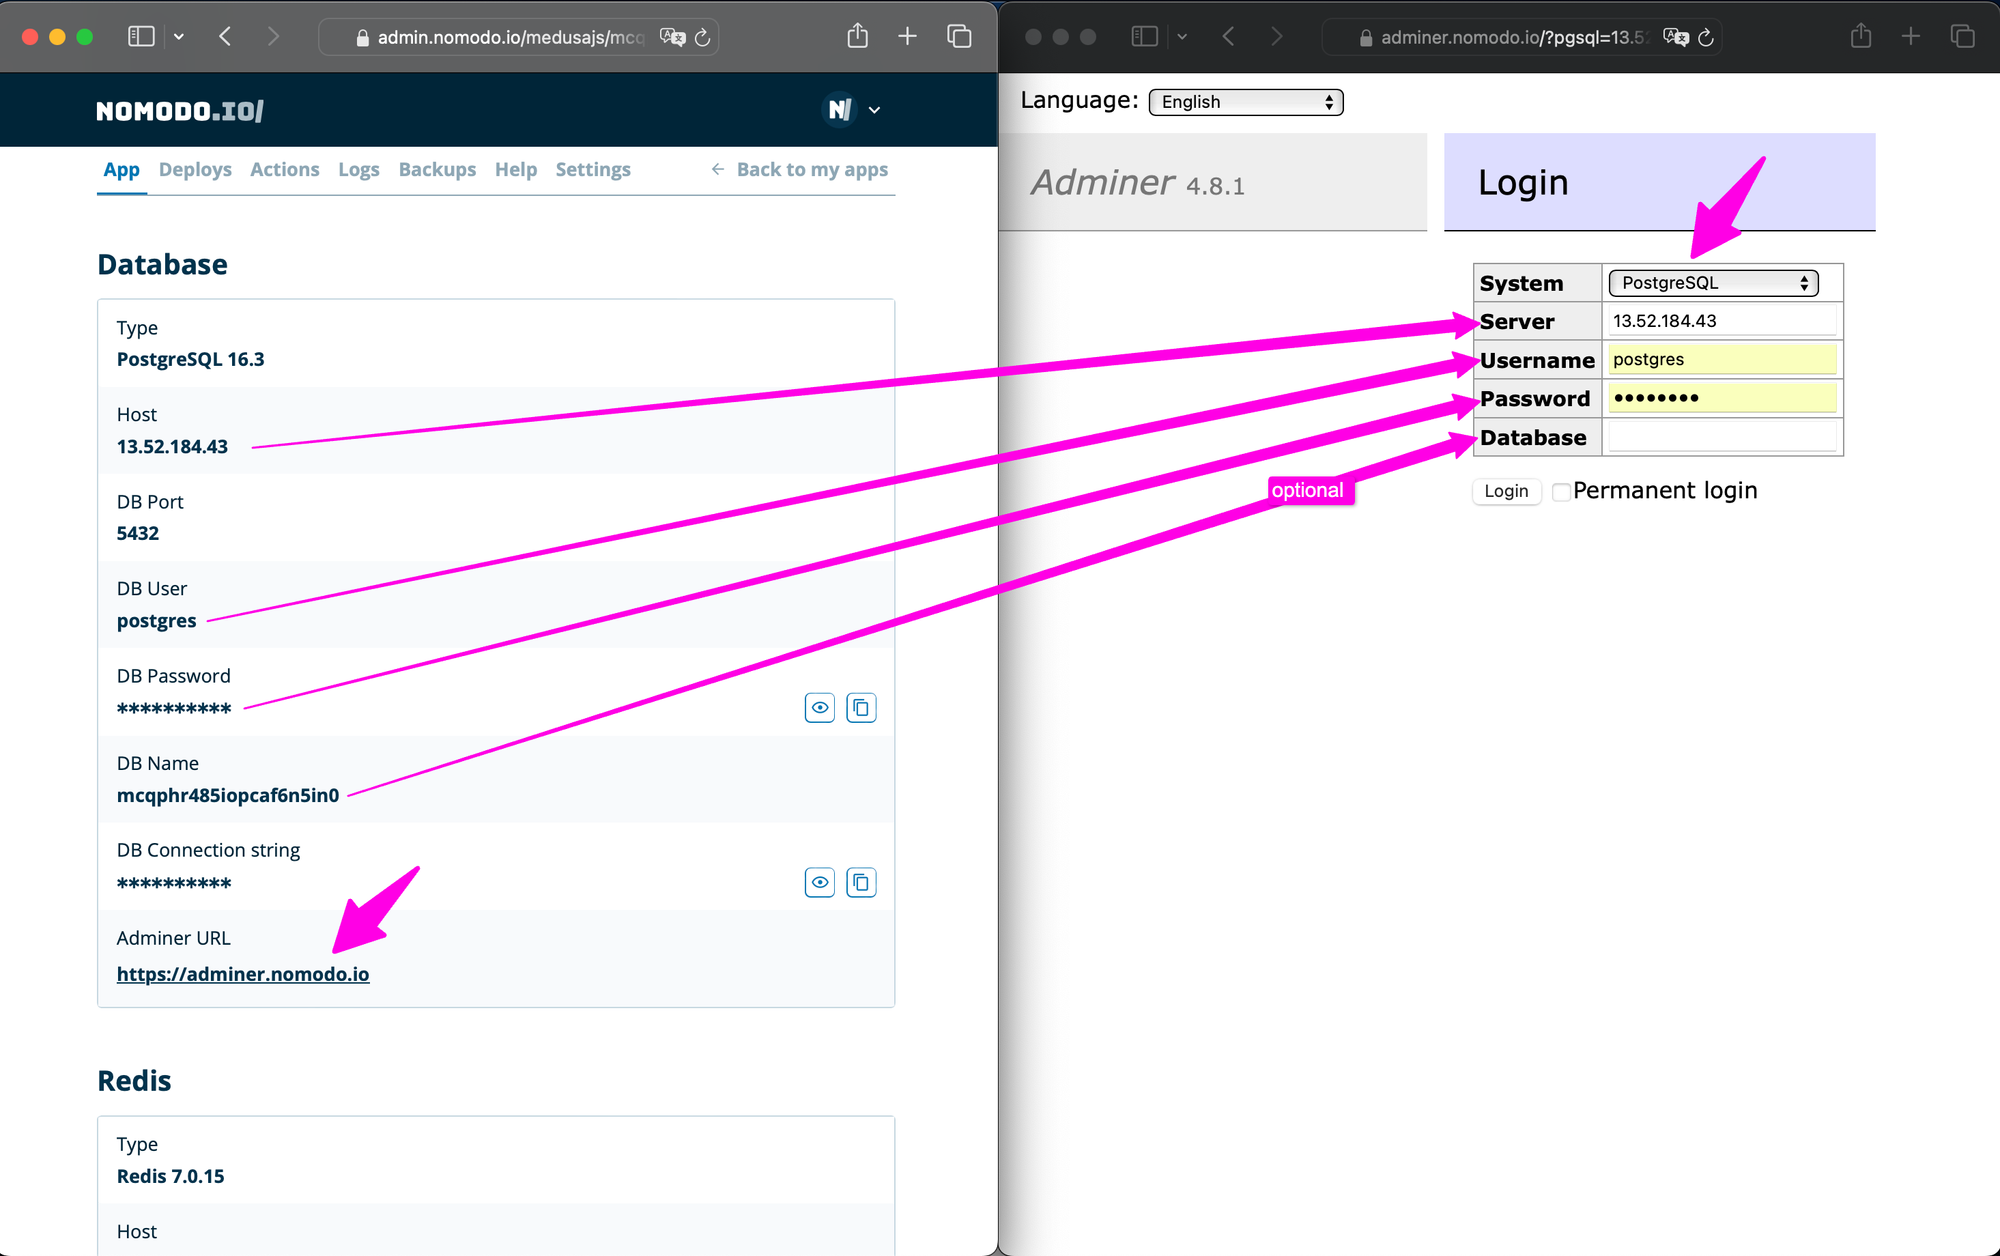
Once logged in, you’ll see tables related to your MedusaJS project, such as addresses, carts, customers, and products. Handle these tables carefully to avoid disrupting your project.
Step 3: Run Database Migrations
After making any changes to your database, go back to the Nomodo admin panel and run migrations. This ensures your database stays in sync with your MedusaJS project. To do this, navigate to the “Actions” tab in the app details, select “Migrations” from the menu, and click on “Run Migrations”.
Wrap-Up
This guide covers the essential steps to connect your MedusaJS project to a PostgreSQL database using Adminer. Following these instructions will help you manage your database efficiently within the MedusaJS environment on Nomodo.io.